Ceci est une ancienne révision du document !
MOVING YOUR MACHINE

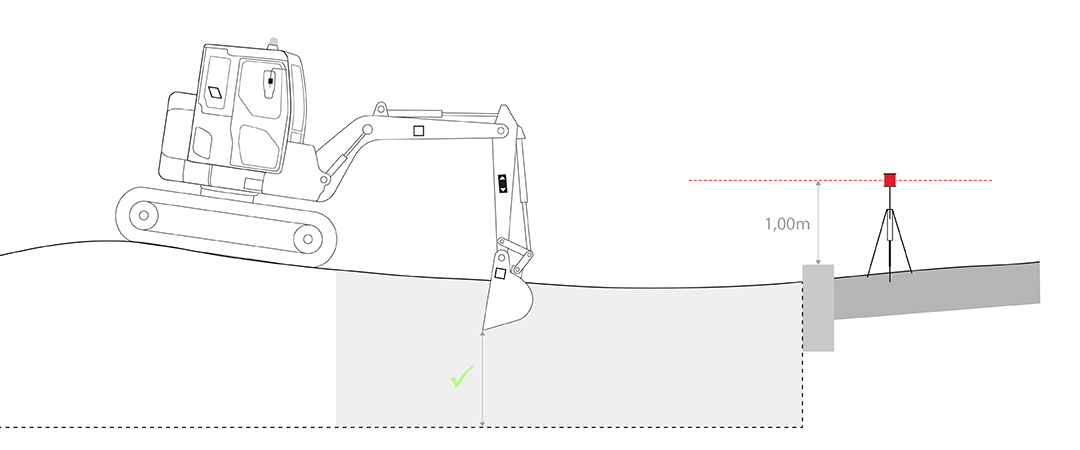
On this site, a 20m trench must be dug 2m below the reference mark, represented by the edge of the sidewalk.
Startup

1 - Ensure that no slope is set (0%) 
2 - Place your bucket on the benchmark.
3 - Edit depth 
4 - Enter “2m” & confirm
Reference Within Bucket Reach
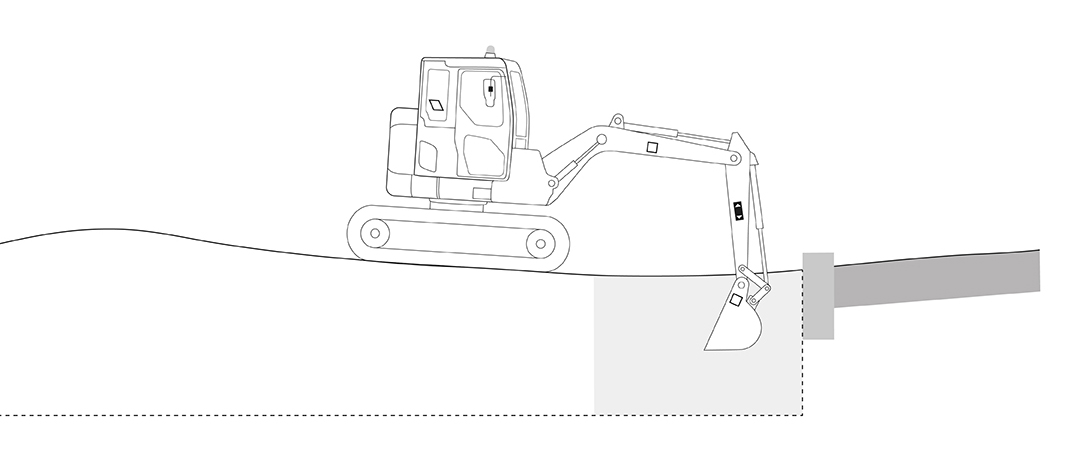
- Start digging according to the system's instructions.
- Your machine must be stable!
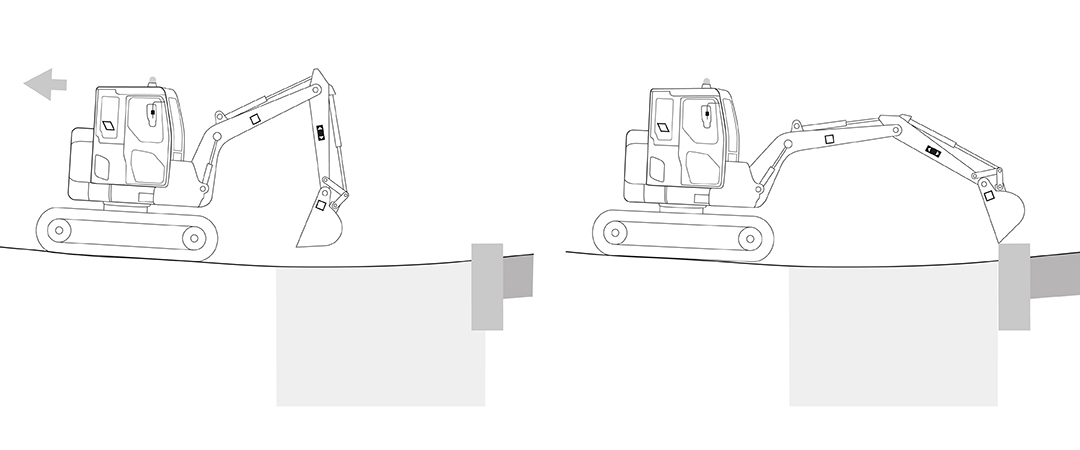
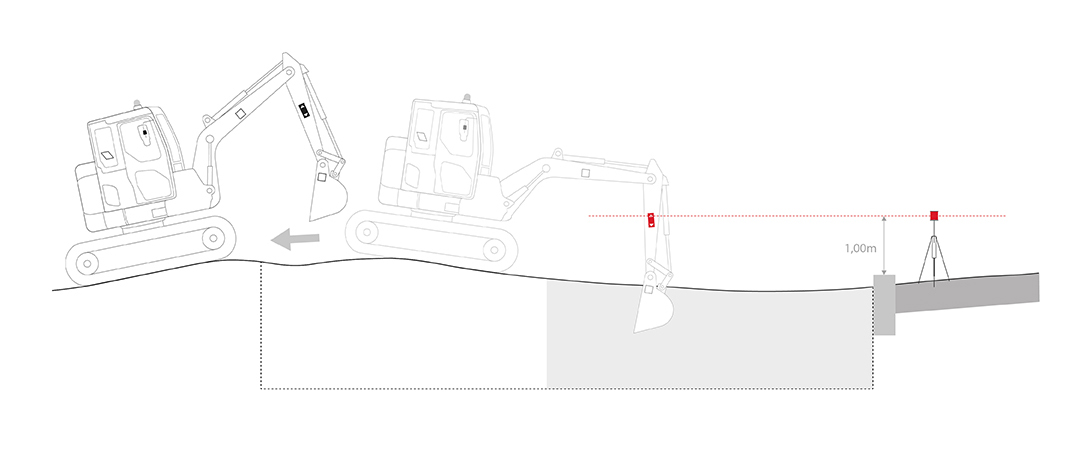
- To proceed, move your machine.
- Place the bucket back on the benchmark.
- Press the “Depth Recall” button to reset the measurement. →

Reference out of bucket reach
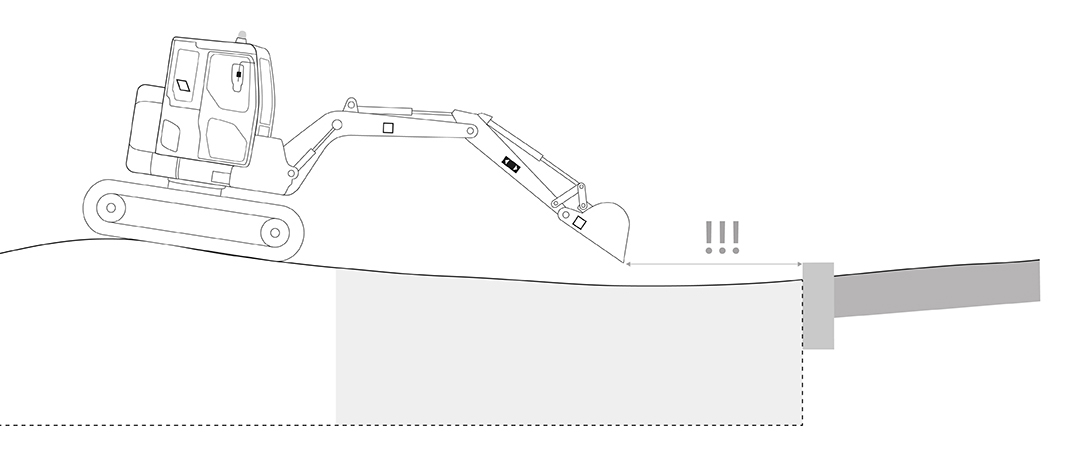
- You are now too far from the benchmark.
- Without a rotating laser, you can reuse a point at the bottom of the excavation, but over long distances inaccuracies are likely to accumulate.
- Time to use the rotating laser!
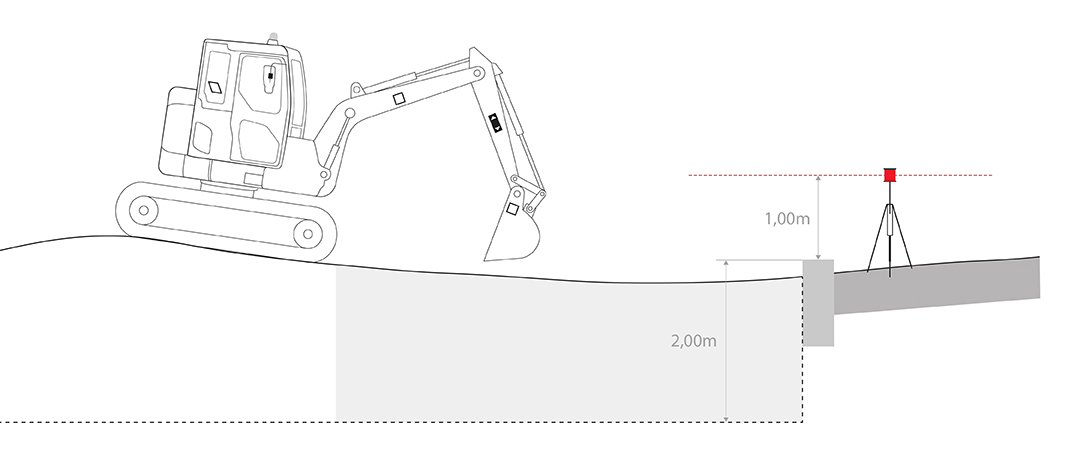
- Place your rotating laser near the benchmark.
- Measure the height between the rotating laser and the benchmark on the site.
- In this example, the height is equal to 1m + 2m, or 3m.

The laser function is available but not yet set. Click on the icon with the padlock.

Click on “Laser Heightˮ.
Note:
- If no laser button is visible, then you must calibrate your laser receiver.
- If several laser buttons are visible except for the padlock button, this means that the system is already linked to a laser reference. Deactivate and reactivate to set up a new laser reference.


Enter the laser height: “3m”, then confirm.

Then catch the laser beam and click “Next”.
Note:
- If the “Autocatch” option is enabled, you do not need to click on “Next”.
- Your excavator is back on your site, and the depth measurement is accurate.
- You can continue digging.
For each movement...
- You need to move again.
- Your laser is now activated.

You have just moved your tracks. Request a laser update.

Catch your laser beam again. Your machine control system is recalibrated to your site…